Edit the Template for New Readings
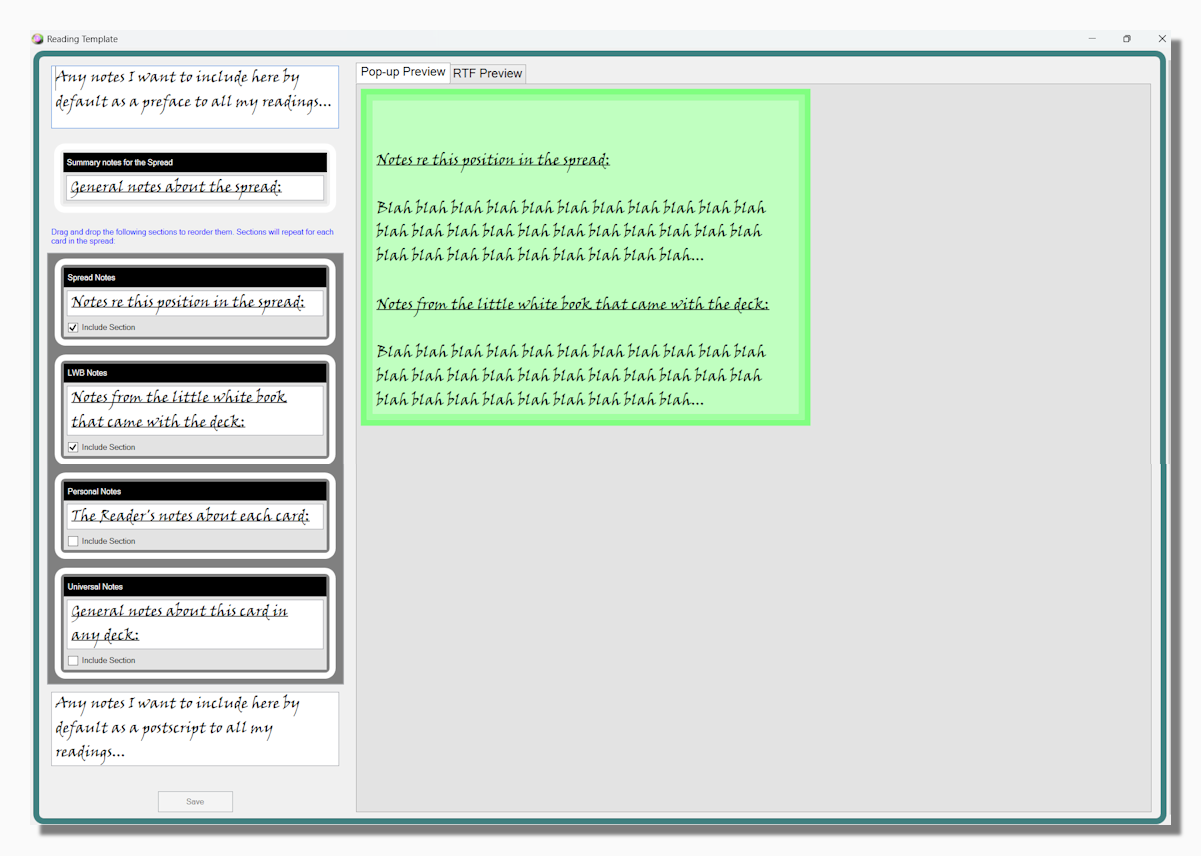
The tool for editing the Reading Template is launched by clicking Reading Template on the My Readings menu, or the Reading Template button in the Reading Wizard.
The form is quite tall, it will not fit on most screens so it is necessary to scroll up and down. The easiest way to do this is to click anywhere on the right hand part of the form (where it says "Pop-up Preview") and use your mouse wheel to scroll, or use the scroller on the far right of the form.
The template form defines the template for New Readings. Editing the template will never have any effect on readings that you have already generated or saved. The template affects two different things. First it determines what notes are included in the pop-up notes when a new reading is created in the Reading Wizard. Then, when these notes are exported to RTF format, the program draws in more text according to the template.
The following diagram illustrates the relationship between the sections of the template and the notes which are generated for each new reading. The numbered notes refer to the numbers in the picture:
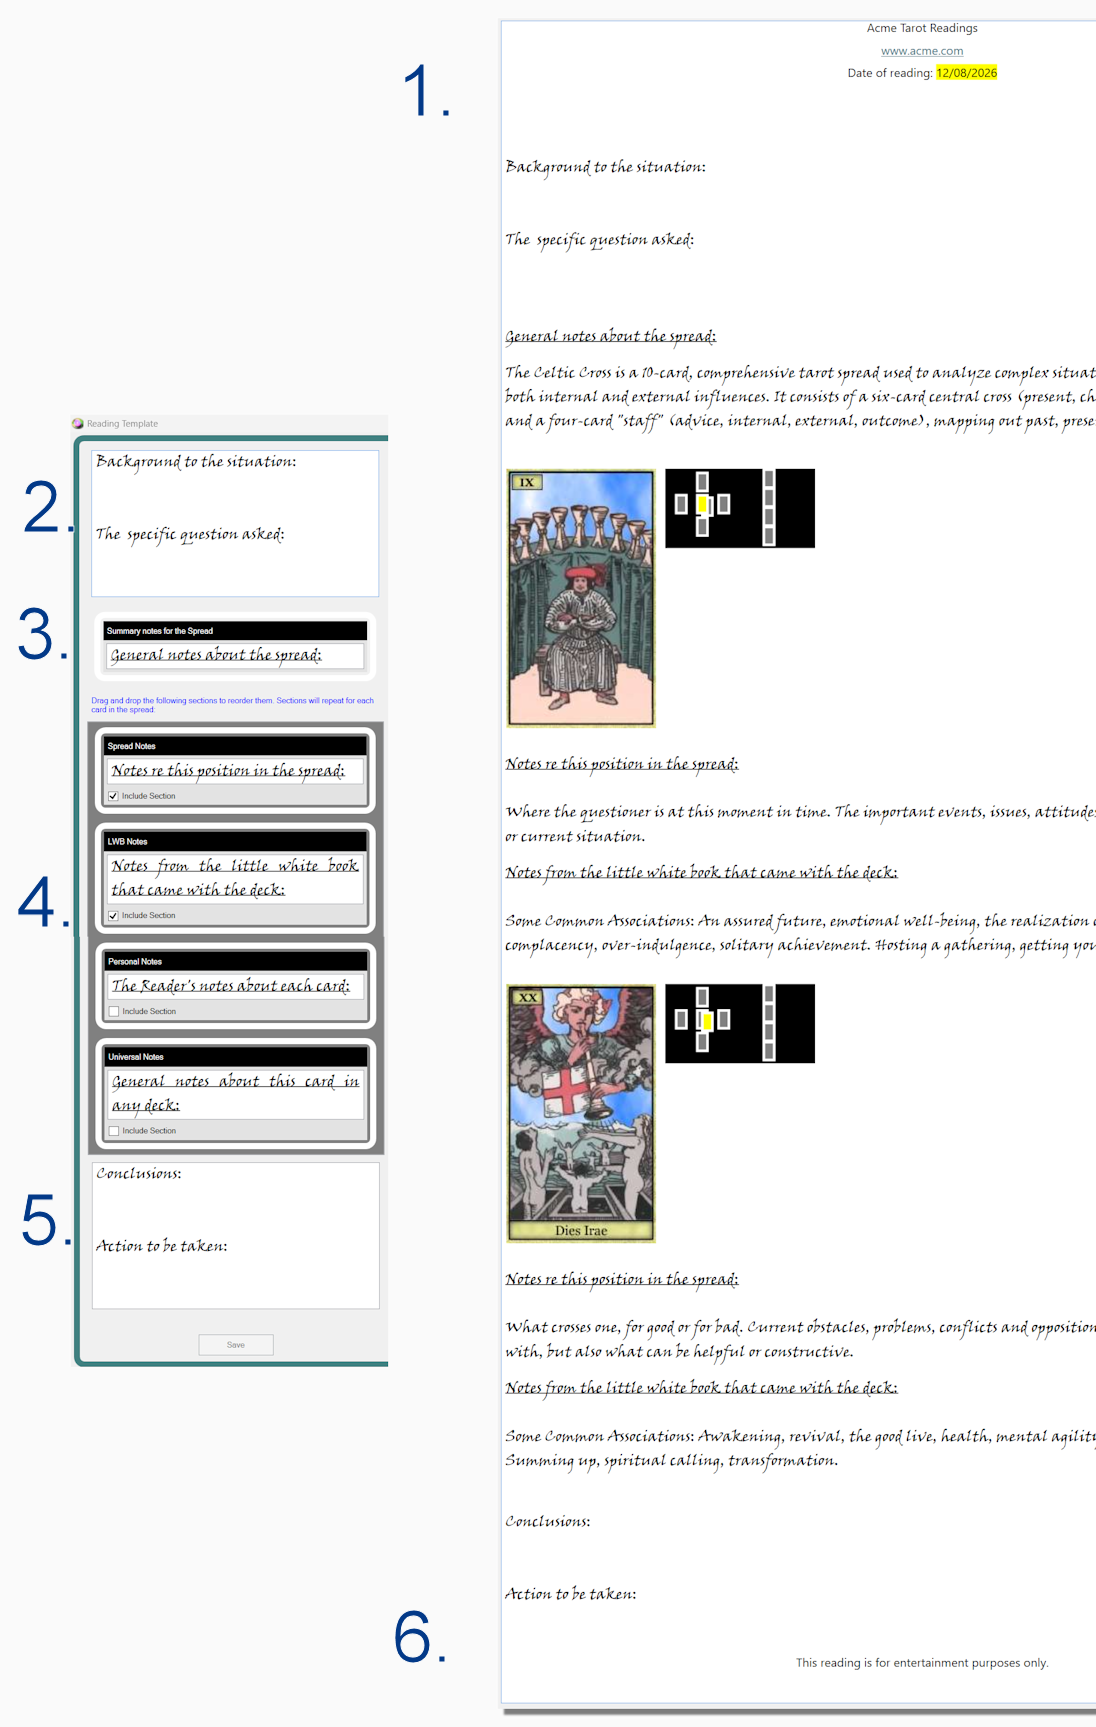
1. The notes at the very top of the RTF window don't come from the template at all. The programs lets you define a separate header or footer document that provides this context. The advantage of this is that it lets you include images and well as formatted text. If you want to create these extra templates they should be called Header Template.rtf and Footer Template.rtf respectively and located in the program's Reading Folder.. These documents also support wild cards:
- "$Readee$" will be replaced by the name of the querent
- "$Reader$" will be replaced by the name of the reader
- "$ReadeeEmail$" will be replaced by the email of the querent
- "$ReadingDate$" will be replaced by the date of the reading
2. The first box on the Template lets you define some text to go at the top of each reading. In this case I have put: "Background to the situation" and "Specific Question asked", but obviously you can put whatever you like. All the text areas on the Template support formatting. To bring up formatting options just right-click in the text area.
3. General notes about the spread. Some spreads come with general notes as well as card specific notes. The spreads that come with version 11 all have general notes, in the example I have used the Celtic Cross so these are the notes that describe the Celtic Cross (If you initially installed version 10 of the program or earlier the spreads that came with the program did not include general notes). What appears in the template is the header text that will be used above these notes. If the notes are not present the header will be suppressed.
4. Repeating sections for each card. In this example I have ticked "Include Section" for the Spread Notes and the Little White Book notes, so these notes will be included for each card, and will both appear in the pop-up notes in the Spread Wizard. The Personal Notes and Universal Notes have not been included. Some people prefer to work always from Universal notes so they might include this and uncheck the LWB Notes for example.
5. Text that goes at the bottom of each reading, the counterpart of (2) above.
6. Text from the Footer Template.rtf file, as described in (1) above.
Tip: You can set the option to include both upright and reversed meanings. By default the notes that are displayed for each card will be the right ones for its actual situation in the reading, whether upright or reversed.
Tip: Within the text for each card you can change the relative order of Spread and Card notes by clicking in the relevant text area and dragging and dropping that section so it moves up or down the list. Place the mouse over the white on black part of the text to initiate this drag action.
Tip: If these instructions sound complicated just remember that in 99% of cases there is no need to change anything on this tool and the defaults will work fine for creating new readings.